GREAT-GREAT Grandma’s Trunk

Hey ya’ll and welcome back,

Even though it has been a couple of weeks since I posted anything it doesn’t mean I haven’t been working. For those of you that follow me on Face Book you know I am starting SouthScape Designs Vintage Rentals. I have been meeting with wedding planners on their scheduled events, and networking like crazy. I have found some wonderful items to add to my inventory that I am very excited about. So keep up as I continue posting my inventory. Whiskey barrels are some of my finds! YAY!!! The full ones are rare, at least where I live. 🙂

So the project I completed is this long-awaited “domed” trunk. This trunk belonged to the great-great grandmother of my client. Yes that was two greats! She was born in the late 1800s! This chest has been in the family ever since…and believe me you can tell it. It was headed to the trash when it was saved by my client. She asked me if I could do anything with it and I just said I have never done anything remotely like it before but I will give it a try. So be prepared I have lots of pictures. I will attempt to give you as much of a tutorial as possible on the process. So this is what I started with.

IMG_0308[1]

As you can see the metal part was a tetanus shot waiting to happen.

IMG_0310[1]

Wow, if this chest could talk huh?! The stories it would tell. So originally I was going to remove the metal from the outside and recover it, then build a shell for the inside, however, it just didn’t make sense to remove and insert when a new bottom would be so much easier. So this is how I decided to start this project.

IMG_0836[1]

My brother and I measured the inside of the lid and cut the wood. One thing you need to remember is when you measure the front and sides you need to determine if the front measurement will be the full length or if the front will butt up to the side so the side edge will become part of the front measurement. I know that sounds crazy but one side has to be “on top”, if you will, so you can nail it. I then cut braces and nailed them in. You can see the wood glue where I sealed the bottom. I used 3/8″ plywood instead of 1/2″ plywood, because it was so heavy that I was afraid that it would take three people to move it.

IMG_0837[1]

I then started to wrap the box with the metal. I ordered the brass nail/tacks to use.

IMG_0840[1]

After I wrapped it I then nailed the wood slats back on and wrapped the corners to cover the edges of the slats. For that part of the metal I folded over about 1/2″ to create a nonsharp edge much like you would do when wrapping a present to conceal the raw edge of the paper. I then cut a strip to wrap over the top to edge and inside the box. I did all of this to replicate the original piece.  Next I spray painted it to match the top, which was brown. I’m sorry I couldn’t find the pictures of that.  My client wanted music sheets to line it with. Remind me to never do that again. 🙂 It wasn’t that bad I guess, but the domed lid with extremely old crinkled wood doesn’t make this job easy. Then with all of the angles that I put in the base from the bracing, it really was a challenge. Good ole Dan Fogerty music.

IMG_1048[1]

“Baby I love your way every day….” ahem…sorry about that I was lost in the song.  Haha, betcha gonna have that song stuck in your head now.

IMG_1047[1]

So now comes the painting part of it. Old White with dark wax was the color of choice. Because this trunk had been in the home over 100 years with people who smoked I knew there would be a lot of tar that would leach out. I have never found anything that would stop this from happening. I did not want to damage the rich patina on the lid by sanding to distress, which was the desired look, so I decided to dry brush first.

IMG_1041[1]

It almost looks like a shadow but I wanted to start with a light hand before I put on too much just to take it off again. I let this alone for a couple of days to see what color it would turn after the tar started to leached out. It almost looked like I had applied the dark wax. I knew I couldn’t finish the bottom until I knew the color the top would be as I needed to age the base to match the top. I covered the base with a towel and beat it with a clump of concrete off an old brick to get a “scattered” beaten look to help the “aged” look. So here is the finished product.

IMG_1042[1]

There were no handles so rope was chosen to replace the old leather ones.

IMG_1043[1]

I tried to use as much of the old hardware as possible. The medallion in the center of the lid is one I  had to replace. I ordered new hinges for the back and the locks for the front, but I was not able to use them because I could not remove them from the lid. I am really glad that I was able to make the old ones work because it helped meld the look of the new with the old.

IMG_1045[1]

IMG_1049[1]

Well that’s it. I hope it did “bring tears to your mom’s eyes” to see it. Happy tears that is. Really the pictures do not do it justice.

Thanks for stopping in and don’t forget to say hi!

Cooled Down Red Hot Chair

Hey ya’ll and welcome back,

I know everyone that loves flowers are enjoying this Spring. Mom’s Iris’s and Amaryllis are absolutely beautiful. And…you know the Humming Birds are back. Mom has her usual seat at the kitchen table watching them. 🙂

Amaryllis 2013

Mom's Iris's 2013

This week I finally got to this chair that my long-time client has been very patiently waiting on. They stumbled on it and bought it for $10. It is one of those chairs that you either go all the way with it, stripping years of paint off, or just giving it a nice easy  face seat lift. I did caulk it some but it made no difference, sanding drips and chipping paint, again no difference and that’s when I knew it would take more work required than anyone wanted invested in it.

W/Ts red chair

You can see the upside down drips in paint on the back of the chair that absolutely would NOT sand out, the cracks and loose joints that could not be tightened because of so many coats of paint on the screws, etc. You get the picture, literally. 🙂

My clients wanted the chair to sit next to a Hoosier I had previously painted and Old White was the color chosen with dark wax. The first coat of paint really changed the look of the chair and by the time I put the dark wax on it you didn’t even see the upside down drips.

Red chair/Old White chair finished

WOW what a difference! Project complete!

Red chair seat finished

Red Chair seat finished

I love the details that show with the dark wax. All the layers of old paint brush marks really give the dark wax something to grab hold of.

Red chair seat finished

I sacrificed one of the Tiger Lily’s for the picture. This is going to look fantastic next to the Hoosier.

Thanks for stopping in for the visit and don’t forget to say hi! FYI I have started working on that “domed chest” some of you might remember me talking about in an earlier post. I can’t wait to show you the transformation!

French Hutch in Old White

Hey ya’ll and welcome back,

We have had quite a bit of rain down here in my country and I took a drive down to Black Lake about 20 miles from my house. There are some very pretty places on this lake, but I am extremely afraid of snakes, cotton mouth and copper head snakes are rampant in areas like this. I thought I would share this picture I took.

Black Lake

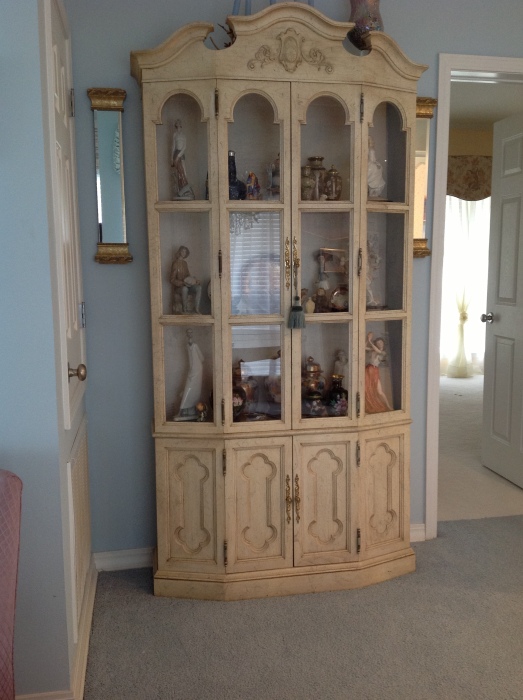
Last week I showed you French Provincial table and chairs that I gave an updated look to and did my first upholstery job on. This week I  have  the hutch. It had the same yellowish finish with those black spots in the finish to give it some type of antique look I guess. I painted it Old White and I put a dark wax glaze on it. Here is the before…

E's hutch before

Here are some details and then I will show you the finish.

E's hutch single door

IMG_0275[1]

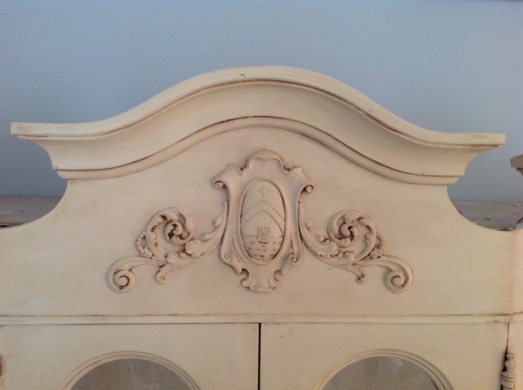
E's hutch top detail

And here is the hutch completed. It really has a new, fresh look.

E's hutch in Old White

If you look at last weeks post I gave some tips on the application of dark wax/glaze. I hope you enjoyed this weeks project. Each week brings something new and interesting for me and I hope for those that are looking for it you will find it too. 🙂

Thanks for stopping in for a visit and don’t forget to say hi.

Linking with MMS FFF

French Table and Chairs

Hey ya’ll and welcome back,

I guess I’m one of those people who can’t seem to follow through all the way with all of my “tech stuff”. While at Kelli’s my Ipad was giving me some trouble so I took it into an Apple Store. They were not able to correct the problem so I was given a new one. BUT…I would lose all my pictures on the old one. “No prob” I said….”I linked to my laptop and downloaded all my pictures so I have it covered.” Well…the rest of the story is that I had NOT done what ever I was supposed to have done to make all of that happen so needless to say all my pictures of jobs that I had completed and would write posts on are now yea, you got it, LOST! That’s what happened last week and I was so frustrated with my self that I just threw the towel in for that week.

But this is another day and another job. We have been blasted with floor work and in the middle of all that I got a phone call. This sweet lady was referred to me by Tres Bien Antiques for an update to her French Provincial table and chairs. She also wanted the chairs recovered. Well…this was something that I had never done except in helping Kelli with her dining room chairs. But these were a lot more complicated. Miss Mustard Seed has given me super powers because I said “Yes I will recover them for you.” This is the old look.

E's chair before

This chair has the finish with the dots and it had a yellow look. The yellow is what she wanted changed so I painted them Old White and applied dark wax thinned down to a glaze. I wanted to “lighten” the color of the dark wax so the glaze would not be as dark so here is a tip.

TIP: To lighten the dark wax color mix clear wax with it. It totally gave me the color I was looking for. Here is another tip.

TIP: When I clean my dark wax brush I save the mineral spirits in an empty wax can. I use this to thin the  dark wax to make my glazes. 

I have no pictures of my recovering the chairs, I was so engrossed into the making the pattern, covering the piping, sewing and fitting to the chairs that no pictures were taken. 😦

E's captain's chair back view

This is the back of one of the chairs showing the reupholstered seat. I think it looks pretty darn good. Especially for my first time.

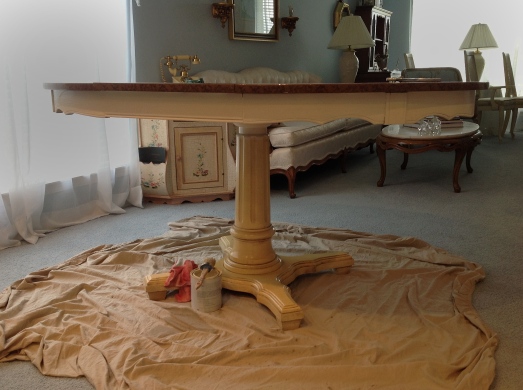
Here’s the table before. The apron and base were different colors because over the years the color had faded.

E's table after

Here are the after pictures.

IMG_0283[1]

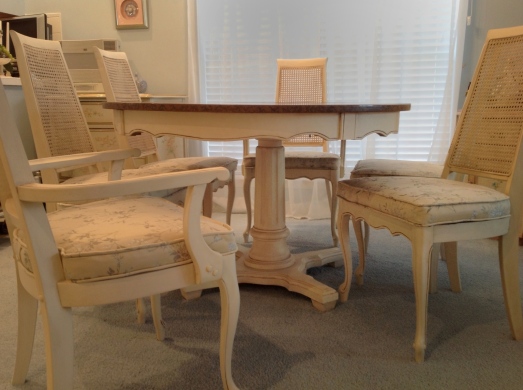
E's table/chairs afterIt all looks so much cleaner and softer. I love the way they turned out. Next week I will share the hutch I painted to match this dining room set.

Thanks so much for stopping in and don’t forget to say hi.

Linking to MMS FFF

Southern Bathroom ASCP Style

Hey ya’ll and welcome back,

I have hit the home road at a running pace, not only with work but with grandkids catching up on Nana time from the month I was at Kelli’s in New York.  So an apology is due for no post last week. I had a SUPER SURPRISE while in NY in the form of a gift to me from my G-daughter. It was a framed picture showing three different poses of her sitting in a chair holding a picture frame. The first was her saying “hushhhhh”  holding a picture frame that said “I have a secret”. The second pose was of her looking down at the frame that said “I’m gonna be a Big Sister” and the third frame was her with a wide-eyed, mouth-open surprised look on her face with the frame saying “November 2013”. WOW, my Kelli is pregnant! Ya know what that means….

So this week is a continuation of the home from my last post with the built-in Emperor’s Silk bookcase. This is her new master bathroom. I love the ship-lap walls above the bead board. Not to mention the beautiful beveled oak hardwood floors. My client found her inspiration for the bathroom counters from Pottery Barn and Old White was the color. Again, she is pulling in one of her favorite colors…red.

B's bathroom straight pic

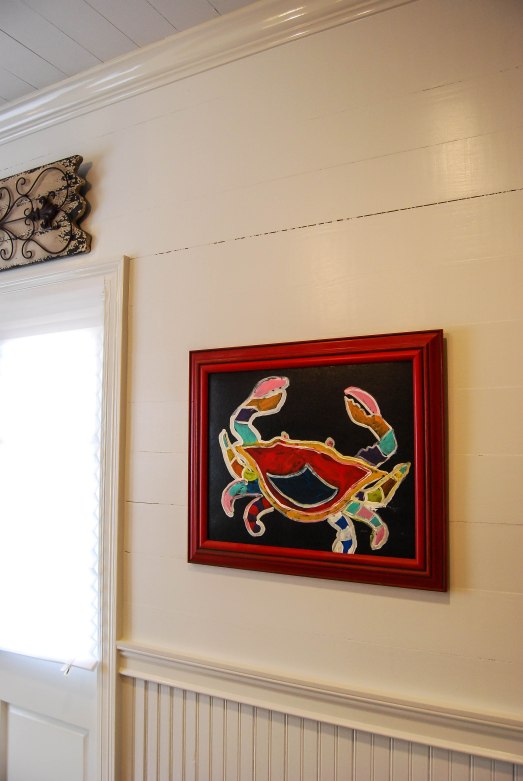
As you can see there are His/Her vanities with granite counter tops and lovely mirrors. Notice her art work between the windows, you’ll love the crab picture in another photo. She brings in such wonderful country, southern and cajun designs and it all works so well in her home. Love those floors too.

I didn’t show the custom shower except in the reflection of this fabulous mirror. It has a rain shower along with the personal shower. They have a seat ledge the full length of the shower. Talk about indulgence!

B's b/r mirror w/shower reflection

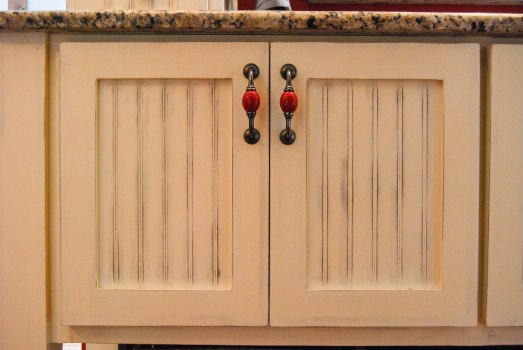
B's cabinet doors

I love french, Natchitoches influence of the fleur de lis on her drawer pulls.

DSC_5623-1

The claw-foot tub is waiting for someone to say “Calgon take me away!” Okay…does that phrase from an old commercial tell how old I am? That’s okay…cuz if you  remember it you’re right up there with me. 🙂 The shelf has crystal door knobs  for holding the towels and burlap flowers.

B's tub w/towel rack

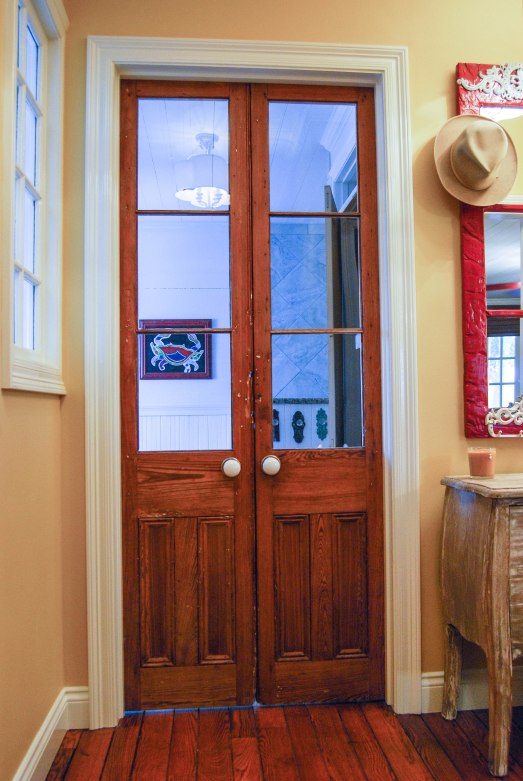
See the window in this view? I featured last week the reclaimed doors that led into this bathroom and on the wall to the left is a small window that overlooks this tub. I love this window that overlooks the tub…in the master suite…just saying. 🙂

DSC_5618-1

If you look at the ceiling you will see the tongue-and-groove wood with ship-lap walls above the bead boarding. Not to mention that  colorful, partyin’ cajun, happy crab.

DSC_5640-1

Ya got to love these door plates with crystal knobs.

DSC_5608-1

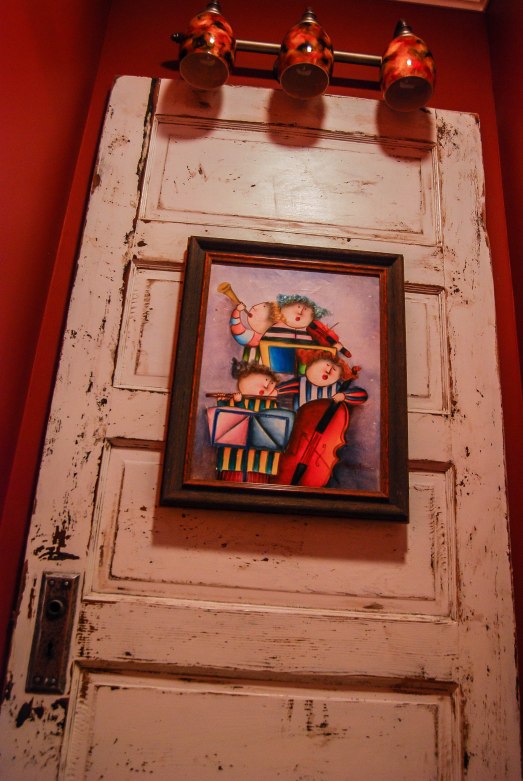
Now get ready for this door lovers. There is an old repurposed five-paneled door behind the toilet! She tells her G-Kids that ” it is the door that leads to nowhere”. Ha! Who woulda thunk to do this!                                                                                                                                                     

B's commode door                                                                                                                                 

I had so much FUN on this project…of course I say that about every one that I do. I love to see the personalities of each of my clients and how it comes to life in their homes. I hope ya’ll have enjoyed this as much as I did in working on it.

I want to give a shout-out to the great people I worked with. Please find their FB page and give ’em a “like”.

Modern Upgrades/Tim Molan – Shower tile work

Prothro Construction/Charles Prothro Contractor

Thanks for stopping in and don’t forget to say hi!


Linking to Miss Mustard Seed FFF

Emperor’s Silk Builtin Bookcase

Hey Ya’ll and welcome back,

Most of you know I am at my daughter’s on Long Island. I just have to tell you this is what I left at home…Japanese Magnolias in full bloom.

Jap Magnolias …and this is what I came to…

Snow in K's back yard

WOW! Both are beautiful in their own right and I love that I can have both. 🙂 My time here is fast coming to an end though…WAY TOOOOOO FAST! Ah well…..

This week I will be featuring my next home reveal. YAY!!! I am very excited about this because my client has such wonderful balance of decor in her home, from country to modern, from old to new. It all seems to work so well together and complements each other instead of one overwhelming the other. Their home is on the beautiful Cane River that runs through Natchitoches, LA. This river is really a huge lake that was made after Red River changed its course and left this lake. This is “the” Red River that starts in the Texas Panhandle and flows over 1,000 miles down to our little town of Natchitoches.

We initially installed hardwood floors in their home approximately three to four years ago. The floors are oak with hand-beveled edges. I say hand beveled because we beveled each and every board, they were not factory done. The boards differed in widths from three, four and five inches. This along with the beveled edges really added to the custom look. They were stained with MINWAX English Walnut and finished with a satin oil-based polyurethane.  They recently added an addition to enlarge their master bedroom suite. This included adding another bath, HUGE-DREAMY-custom closet, laundry room, and wonderful home office. This addition also included a built-in bookcase on one side of their fireplace in the living area. This bookcase is what I will be featuring this week.

She wanted the bookcase to look like two pieces of furniture so she chose the top part to be Old White with dark wax. The TV was to go in the center with two glass-door-enclosed sides with adjustable shelving. The doors had fluted trim with corbels on top.

My client loves red and it is a color used in her decor all through her home so the bottom color was Emperor’s Silk distressed to Arles. I had been wanting to paint with Emperor’s Silk and Arles for soooooo long and now I have the chance. I was so excited that my clients had been choosing the very colors I wanted to use.

B's full bookcaseThe red and white pulls were installed with the colors of the pulls being opposite the painted color.  The red pulls on the Old White and the white pulls on the Emperor’s Silk.

B's Side case with lights

B's O/W bookcase corbel

B's bookcase door pull

B's b/c fluted trim in ES

B's b/c in ES door pull

You can see the dark wax in the bead board. It is so pretty.

I have several other things I love in her home that I want to share with you. The antique doors that led into her new master bath were purchased in Lafayette, LA. Because the floors were stained she wanted to leave the doors in their natural state.

B's b/r doors

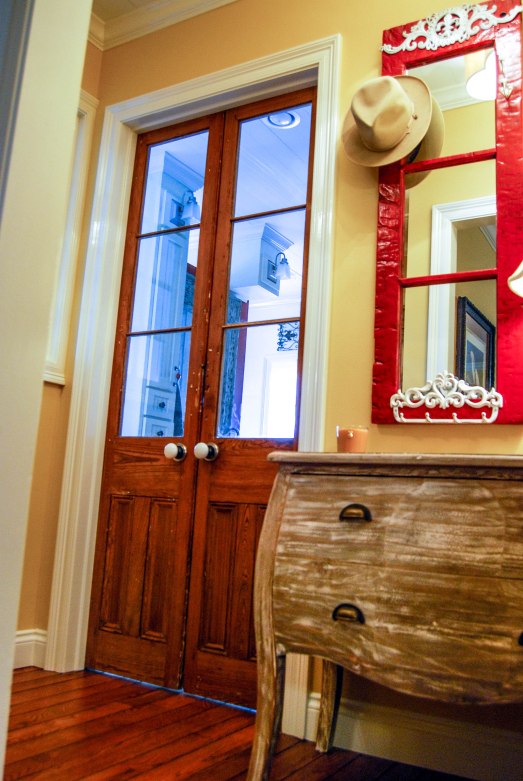
B's entrance to m b/r suite

The next great thing I want to share is the light fixture in the laundry room. Can you see what it is?

B's l/r light fixture

Door knob plates! I’m not sure about ya’ll but I haven’t ever seen this before! I love this mixture of old and new. Here are the shutter doors she bought to go into this room and also her custom closet.                                                                                                                                            

B's shutter doors

Ahhhh…those beautiful oak floors.

So what do you think? If you have enjoyed this just wait until next week when you see her master bath.

Thank you so much for stopping in and sharing our southern homes and don’t forget to say hi.

Linking with Miss Mustard Seed FFF

OMG ASCP Bathroom Reveal

Hey Ya’ll and welcome back,

I want to make sure Chelsey Frederick gets credit for all her hard work in taking the pictures for this post and the next two weeks. Chelsey is a junior at Northwestern State University in Natchitoches, LA and photographs the animals for Hope for Paws. Thanks Chelsey!

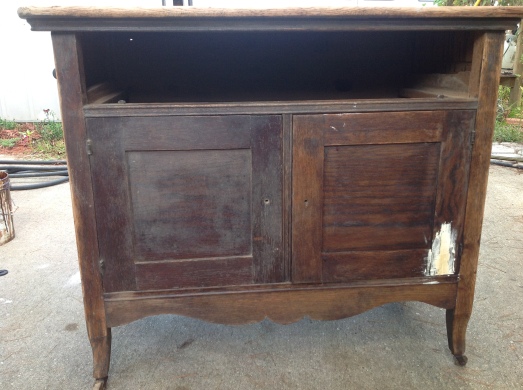
This week I have the second half of my clients home to reveal. Last week was her amazing kitchen now it’s two of her bathrooms. My brother was working on her home installing the wood floors when he saw her trying to strip the top of an old cabinet that she wanted to use in her bathroom as a vanity. She found out real fast, as we all do, that she did not want to tackle that job. So he loaded it and brought it home to me. This was the first thing I would do for her. I did not do a post on this cabinet so I can’t link you to anything for more detail. But I will show you a before picture. I had to repair a crack in the door on the bottom.

L's before vanity d/s

This is it when I delivered it.

L's vanity on delivery

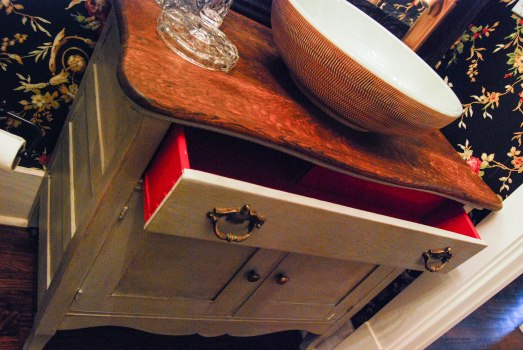
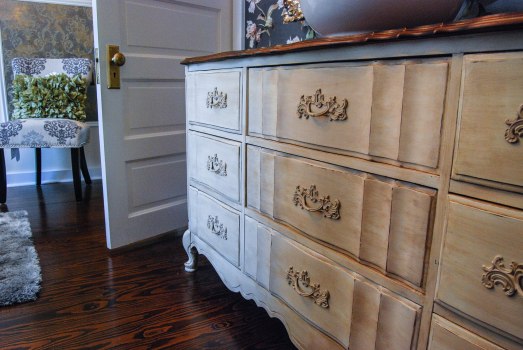
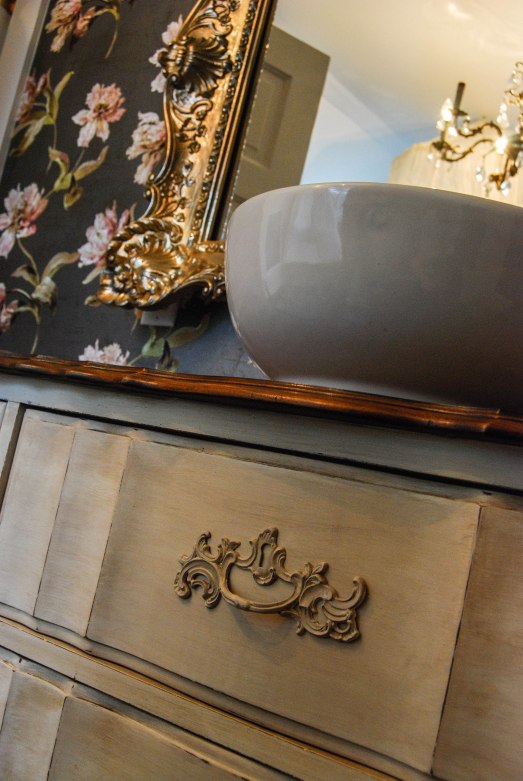
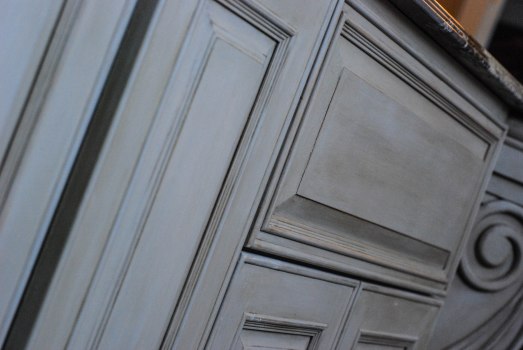
I painted it Paris Grey with dark wax.  The center part of the drawer was removed to allow room for the plumbing of the vessel sink which created two narrow drawers on each side. I also painted the inside of the cabinet and drawer a pretty red. I stained the stripped oak wood with MINWAX dark walnut which is what we stained the floors with.

L's cab

L's vanity d/s w/red drawer

This sink was so pretty. It was brown with carvings/grooves cut that revealed a grey color with the inside of the bowl also being grey. It was the perfect sink for this grey-with-dark-wax vanity.

L's d/s vessel on vanity

L's rose on d/s vanity

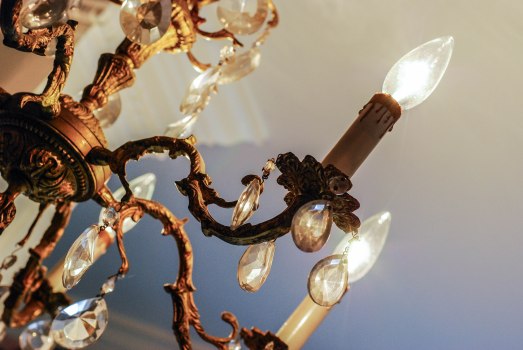
L's chandelier d/s b/r

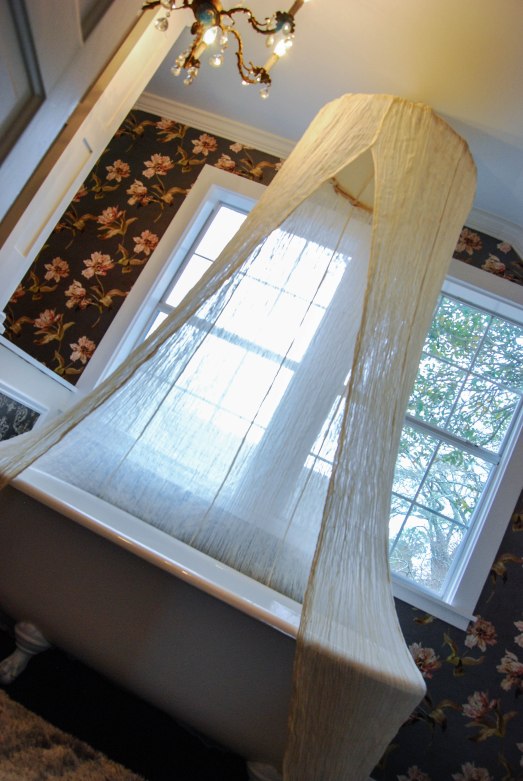
The shower was grey marble and had a natural linen curtain that hung from the ceiling and pooled on the floor. She has some amazing light fixtures in her home.  The mirror was the width of the vanity and was between five to six feet tall with a beautiful dark wood frame.

The upstairs bathroom has a completely different feel to it. I will show you with the pictures and describe it as we go.

L's landing

This picture really shows how pretty the floors are.

L's u/s vanity

To get the detail on the dresser turned vanity you can click here.

L's u/s vanity w/vessel sink

L's u/s tub

To the left of this great claw-foot tub there is a toilet and bedet.

L's u/s b/r chandelier

L's u/s mirror

Well there you have it. My first home reveal. What do ya think? 🙂 As always thanks so much for stopping in and don’t forget to say Hi!

Please stay in touch because I will have another home reveal over the next two weeks.

Linking with:

Miss Mustard Seed FFF

OMG!!! An ASCP Kitchen Reveal!

Hey y’all and welcome back,

I am so excited about this post. I have been waiting for it for so long and it is finally here. Kelli suggested that I contact a photography class to see if there would be any eager students that would like to take on the challenge of taking the pictures for me. So before I start I have to give a shout out to the Director of Art Department at Northwestern State University in Natchitoches, LA for directing my email to the professor of Photography. He chose Chelsey Frederick to help. Chelsey is a junior and photographs the animals for Hope for Paws. Thanks Chelsey!

The first home I want to share is an old home that was gutted and had additions added on. So the first thing we my brother did was install hardwood floors. After installing and sanding the hardwood floors it was time to stain with MINWAX dark walnut and then three coats of satin oil-based polyurethane. BEAUTIFUL!

As we were working on the floors our client started talking about her kitchen and how she would LOVE to have it finished but couldn’t find anyone that could paint it with “that distressed look”. When she left I said to my brother “you KNOW what I want to do don’t you?” He said “yea…I know what you want to do”. 🙂 But………so far……..I had been the only one really excited about ASCP. After talking about it we decided that we would do the kitchen if our clients wanted it too. So I whipped out my IPAD, showed our client my work and they said YES!

I first stained all the areas that I wanted to distress. On new cabinets you also have a LOT of holes to fill, which isn’t hard it’s just time consuming. Then the painting started.

L's unfinished cabs w/stain

Pure White was the color chosen distressed back to the stained wood.  The cabinets had a lot of detail that the distressing really complemented. The ASCP brush worked quite well when painting the dental molding. ASCP brushes are made for the stippling motion as it doesn’t destroy the natural bristles. I knocked those out in no time compared to the time it took with a regular paint brush. After painting two coats of Pure White, I waxed with clear wax, left it to dry overnight, the next day I buffed, waxed and then buffed again the following day.

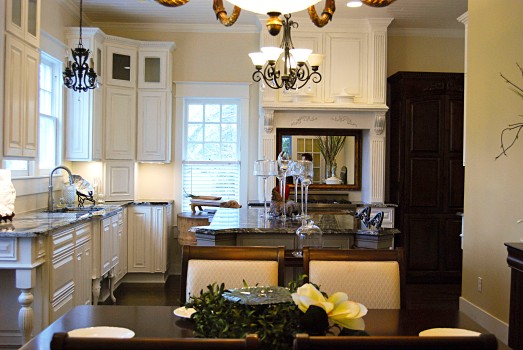
L's Kitchen

Absolutely beautiful!!! Our client had a custom armoire built to cover her refrigerator. We stained it with MINWAX dark walnut also.

L's refrigerator armoire

Poche’s Wood Specialties, LLC

In the next picture you can see the pretty floors. There is a seamless transition from new floors to the almost 100 year-old floors. MINWAX stain is wonderful in helping the color transition.

DSC_5365-1

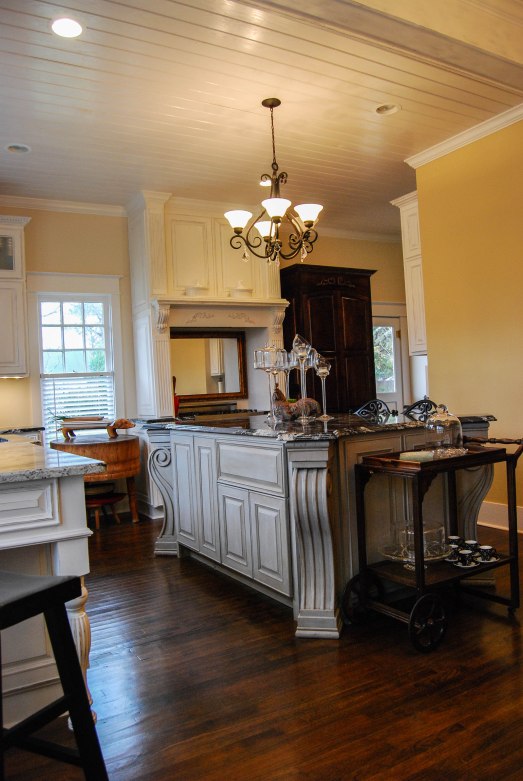
The island was painted Paris Grey with dark wax. The granite is black and white with sparse strains of red running through it and has a triple-pencil edge that was hand buffed. Looking into the kitchen on the right side of the island you will see the two bar stools. On one end there is an antique tea cart. On the side of the sink the island has a warming drawer, storage and a trash can. Across from the stove there is a microwave drawer and more storage.

Warmer drawer

Island details

On each side of the stove there is fluted trim that conceals an upright drawer that pulls out spice racks. The tradition in this family is to have a mirror above the stove.

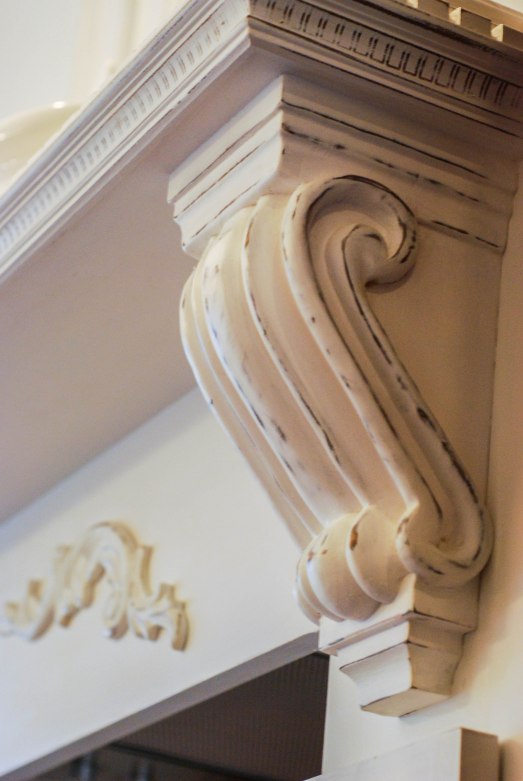
L's red stove Above the beautiful red stove was a mantle with storage above. This picture shows the pretty corbels and dental molding. I love the distressing.

Stove mantle

The cabinet below the sink looks like a piece of furniture with the wonderful curvy legs.

L's kitchen sink view

Across from the refrigerator there was a small wall with cabinets above and a small desk-style counter. The counter top was extended to the window and braced with two spindles that were begging to be distressed.

On the ceiling there is a load-bearing beam where the new kitchen was added to the old part of the house. This beam was already painted white, but my client wanted to have it wrapped with reclaimed wood but it was not to be so the next best thing was to paint it Coco then Pure White and distressed. It was amazing how something so simple changed the look of the room. It looked so good with the finish of the cabinets.

L's kitchen beam

Here are some detailed pictures.

Spindle

I love the swan chandelier.

Swan chandelier

Island detail

Counter top view

The chopping block was handed down to her. It had been painted red but she stripped the paint off. The pig is a cool touch.

L's kitchen chopping block

So there it is my first kitchen. I have shared the kitchen this week. Next week I will share the two bathrooms.

I want to thank my clients sooooo much for allowing me to share their home with y’all. Please if you like it give me a shout out so I can pass it along to them. Also, if you have ANY questions about what you see please let me know, if I have the answers i will share them with you.

Before I leave I want to give a shout out to Poche’s Wood Specialties, LLC (www.pocheswoodspecialtiesllc.com) for doing such a great job on the cabinets. Give Burt a “like” on facebook and see some of his other work.
Thanks for stopping in and don’t forget to say hi.

Hoo Hooo Hoooosier Cabinet

Hey Ya’ll and Welcome Back,

First of all I would like to thank everyone that visited last week and commented on the post and also by email. I have had so many requests for a picture of the barn-door headboard completed with the bed. While delivering this headboard I asked my client if I could get a picture of the bed after it was finished and YES it will happen! Please look for it in the coming weeks. IT IS BEAUTIFUL! And…her  husband now has the “vision” too. 🙂

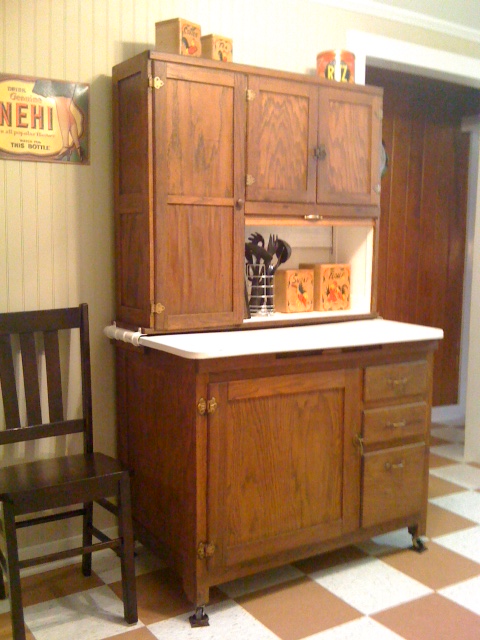
So remember the bedroom suit with the tiger design? remember the barley twist table with the four chairs? remember…oh yea this “remember” is for this week’s post. Here is another wonderful piece from my very special client for you to remember. Yes it is a Hoosier cabinet. This type of cabinet has been made from the early 1900’s and almost all of these cabinets were produced by companies located in Indiana. If you’re wondering why they are called “Hoosier’s” its mainly because the largest of these companies was Hoosier Manufacturing Co. of New Castle, Indiana.

This is what I started with. Not bad huh? There were some issues with the veneer on a couple of the panels and after that was repaired it was my turn.

Hoosier before

Here is the inspiration from Pottery Barn. They loved the different colors peaking through on the panels. Can you see all the colors?

Pottery Barn Inspiration

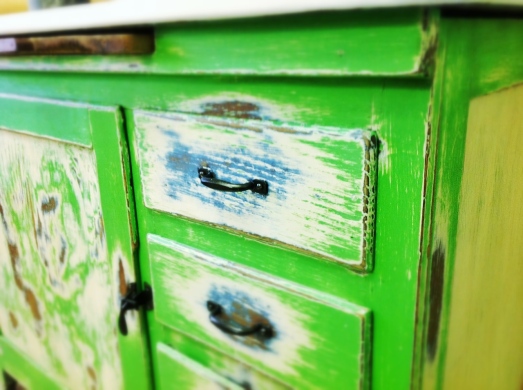
Initially, my client wanted Antibes but a softer green like the inspiration above. I mixed Annie Sloan’s Cream, Pure White and Antibes and had the match when they decided to use straight Antibes. If you have painted with this color you know that it can be very intense and was a bold decision on a piece this large. The Pottery Barn console looked to have used three colors. So, three colors are what I used too. First, I painted the whole cabinet with Greek Blue. I painted the whole cabinet instead of the distress points, because I  had no idea where those distress points were going to be. Second, was Old White and thirdly, Antibes. The panels were painted Old White again. TIP: If you don’t have any Old White, four parts Pure White and one part Cream makes a perfect Old White!

The distressing on this piece, I have to say, was well beyond my comfort zone!   I first handled the cabinets as if I were using it to find where my hands would naturally go to and that’s how I started the initial distressing. I sanded then let it get cold. I would come back to it and sand some more! After I had a starting point with this technique I then started the all-over sanding process. I used a sanding block, the kind you add your own paper to, because I wanted to control the grit of paper. The grain of the wood then took a life of it’s own and developed it’s own “worn” look.

Funky Hoosier

I had fun with this first picture by using a “funky vintage” look. Cool huh? Okay, here’s the original.

Pic untouched

I loved the built-in chopping board. I did show a lot more of the Greek Blue than the inspiration, but while sanding the drawer, WOW!…it just looked perfect!

Hoosier Drawers

The edges of the doors were well worn and I love the way they distressed. The latch was originally put on crooked and I left it that way.

Hoosier door detail

After the distressing was complete I waxed with clear wax then added a dark wax glaze that completed the WOW factor. I watched this piece take on that amazing aged look as I worked.

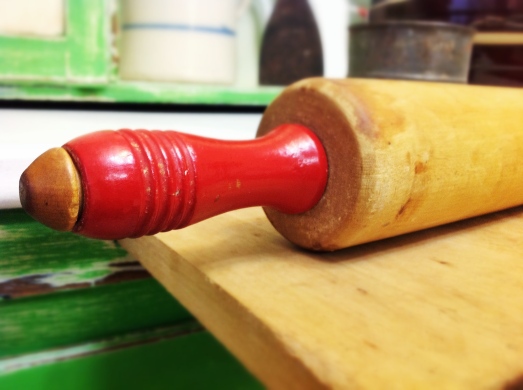
I could see this cabinet waking up in the morning with the crock bowl and old flour sifter and biscuits being rolled out on the enamel top. The rolling pin belonged to my grandmother. I remember sifting flour as a little girl with the sifter.

Hoosier rolling pin

I had such fun with this piece. I hope everyone that see’s this post enjoyed it as much as I have in creating it.

Thanks for stopping in for a visit and don’t forget to say hi.

Close the Barn Door! Oh Yea!…its a Headboard Now!

Hey Ya’ll and Welcome back,

It’s a Nana’s world! I guess that’s all I can say when you have four of the most beautiful grandchildren in the world!….NOOOO there’s no partiality here! HAHA.  Actually, I have three that I can hold now and my sweet four-year-old that I will hold again. There is a reason why grandchildren and grandparents both have the word GRAND in front of each! We are made for each other and don’t we know it. The little ones know that with grandparents it’s spoil time and we grandparents have SOOOO much fun doing it. My two local grandkids call for weekend time and most mornings I get a phone call all the way from New York with my three-year-old wanting to do Facetime. What would we do without technology! It’s the next best thing to being there. It’s a GRAND time!

This week I have made three barn doors into a king-size headboard. My client called sometime around November but with all of our differing schedules it was just recently that we connected to decide the details on the headboard. She saw these doors leaning up against an old barn and of course the brakes were applied and the car was put into reverse. All the while her husband was asking “…you want to do WHAT with those rotting doors?!” It’s called VISION. 🙂

Doors for headboard

If you look at the bottom of these doors you can see how they had started to rot. We decided that we liked the look of the rotted rough edges and wanted to leave that look. We took measurements of the king-size bed and decided the headboard needed to be 84″.  Because these doors are made from beaded lumber (tongue and groove) we my brother removed four of the boards from one door and would use it in the middle with the two full-size doors on each end. I really did not want there to be “new” lumber on the back of this headboard so we re-used the four boards we removed to frame the back for support.

Back of headboard

When we removed the boards from each side of the door we still had the original “Z” brace left. We cut off the extra brace but left approximately one inch on each side to attach the other two doors. You can see the boards on the bottom and top used to brace and hold the shape of the doors. I love that we still kept the old look even on the back side. It’s like sewing and needle work, if someone looks at the back you want it just as neat as the front. 🙂 The headboard will then be attached to the bed frame and Voila! it’s done.

Annie Sloan DuckEgg Blue was the color chosen with Old White peaking through. The color of this aged wood was a beautiful gray and I couldn’t have found a better color to distress to if I had wanted to. I love, love, love this headboard. It was such a fun project and I love that my clients trust me to make their “vision” happen.

Full shot headboard

Here are the beautiful details.

side view of door knob hole

A view of the rotted well-worn top. :).

Well-worn top

knot

Well that’s it for this week. Thank you so much for stopping in and saying hi. You can also visit me on Facebook at SouthScape Designs and please give me a big shout out and a “like”. I love hearing from you. I’ll see ya’ll next week. You’re gonna love what I share then!

Linking with:

Miss Mustard Seed FFF